Do you plan to create a website with WordPress but not sure where to start? The idea of using WordPress when you are not tech savvy can be daunting but
With this guide, we will take your hand and give you a step by step overview of creating a website with WordPress from start to finish. WordPress is the most popular platform when it comes to building a website, WordPress powers 30% of the whole internet!! It’s user-friendly, works for any business, online shops, and even multinational organisations. See our post about WordPress Business Websites
Furthermore, creating a website with WordPress does not require you to learn programming languages which could take some time! With WordPress, all you need is a day or two and your website will be up and running.
The first thing you should know is that there are two types of WordPress site. A self-hosted one and one hosted and managed by WordPress themselves. I would suggest you go for the self-hosted version from WordPress.org. This capability enables you to come up with any website you want with any theme or plugins you want. Here is a guide to getting started with WordPress.
Web Hosting And Domain Name
For any website to go live, you first need a domain name which identifies your site. You also need a hosting service that will act as a link between your website and the internet. In other words, without a domain and web hosting, your website will never exist.
Before selecting a hosting service, look at factors like security, customer care, website backups, WordPress maintenance costs, account limitations, and email options. For WordPress, you can use reputable companies like BlueHost. Bluehost is recommended by WordPress. After you have settled on your preferred hosting company, it is time to purchase your hosting plan. Visit the hosting website and create an account.
You will then select a price plan for your WordPress website. Note that while creating a website with WordPress, your host will recommend the popular web hosting package among other users. Chose the one that suits your needs.
You will then check the availability of your domain name. If it’s not yet available, you can go ahead and register it. Once your purchase is complete, you will receive an email with login credentials to your control panel
Linking Your Domain and Hosting
Now that you have a domain and hosting you need to link them. If you have chosen to get your domain and hosting as one package then you may not need to do this. If you got them separately or from different services then please read this bit carefully.
Once you have your hosting account you will need to add your domain as an account in your control panel (Cpanel). The Cpanel is the hosting dashboard that lets you manage your WordPress website. A Cpanel lets you create emails and install WordPress or even other website software.
Once you have added your domain/account to the hosting you then need to go to your domain registrar account and point the domain to your hosting by changing the nameservers. This then links the domain and hosting.
Looking for a complete WordPress Maintenance Plan?
With all ThriveWP care plans, we include free migration, malware removal, daily/hourly backups, plugin theme and core updates, ongoing support and 24/7 security monitoring and firewall.
Installing WordPress
The next phase of creating a website with WordPress is installing it to your hosting. Note that a majority of hosting companies usually have a one-click WordPress installation feature. If you are using Cpanel then you can scroll to the bottom of your dashboard and you should see a WordPress icon. If your Cpanel lacks this, you will have to install WordPress manually .
After clicking on the WordPress icon, you will be redirected to another page where you will be required to select the domain to install WordPress.
There is a dropdown section where you will select your domain and move to the next stage. In the next phase, you will key in the website name, admin username, and the password. This details can be changed later under WordPress settings. Ensure all checkboxes are marked and click install at the end of the screen. When the installation process is complete, you will get a notification message.
At the same time, you will receive an email with your login details and the WordPress backend login details. Congratulations WordPress is now installed!!
Designing the Website
What you get after installing WordPress to your domain is a basic website that probably does not resemble what you want. It is important to note that any WordPress appearance is determined by the theme you chose. Themes are designed templates that are being used to control a website appearance.
The first step of changing the theme is to login into your newly created website. You can change your theme from the WordPress admin dashboard by clicking on “Appearance” then “Themes” and then “Add New” button. On the next page, you will be presented with thousands of free WordPress themes from the directory. You may at this point also want to put up a coming soon or maintenance mode page while you build your website. Take a look at our How To Make WordPress Private Guide
WordPress has different ways of sorting out themes based on factors like the most recently released, featured themes, industry and so on.
If you are having trouble settling on a theme, there are few things that can guide you along the way. Always go for a theme that enhances simplicity. Avoid themes with flashy colors as they might appear complex for visitors. Also, look at themes that are compatible with many popular browsers.
If a theme is not compatible with a majority of browsers, chances are high that you might end up losing some of the visitors. Furthermore, go for a theme that has an effective user support system to help you out in case of difficulties. Lastly, ensure your theme is SEO friendly and is responsive.
A responsive theme means mobile friendly, a theme that will adjust to whatever screen it is viewed on.
Now that you have your theme and selected it, let’s install it. After clicking on the install button, you will be asked to activate the theme. Note that, changing themes does not delete any content or pages.
After installing the theme, you will have to customise it. Under the “Appearance” menu, click on the “Customise” link to start the process.
While customising the theme, WordPress presents you with a live preview to monitor the changes. You can customise things like typography, site logo and Favicon, colours and a selection of other aesthetics. More customisation can be done after adding some content to the website.
Adding Content On WordPress
WordPress has
Normally, WordPress shows your blog posts on the front page of the website but this can depend on the theme you use.
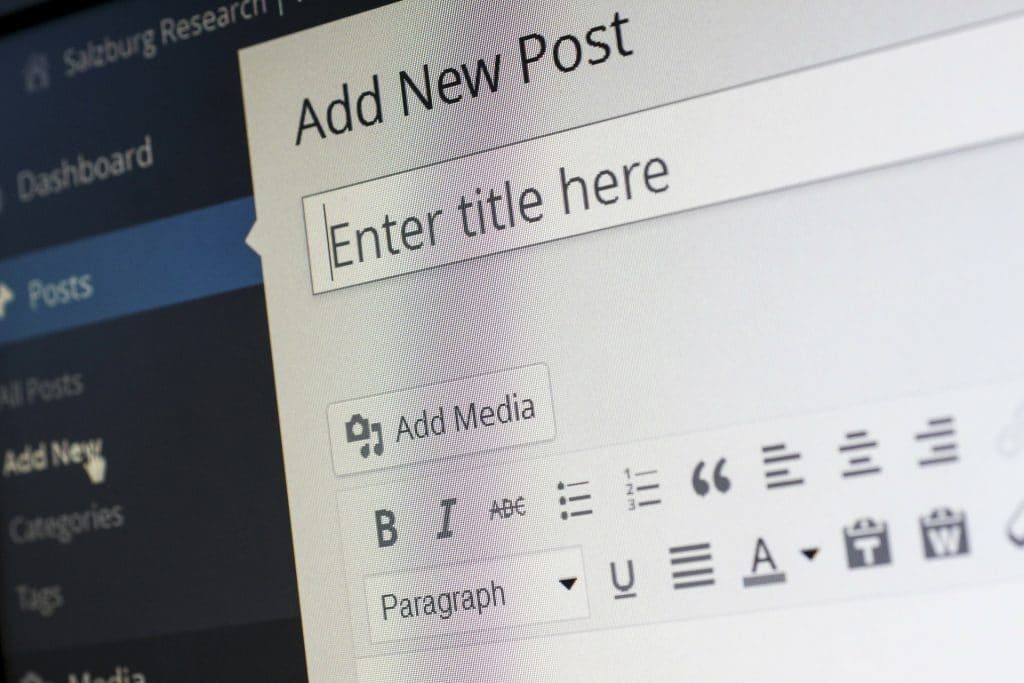
You can alter that, and make WordPress show a preferred page on the front. To add pages to your WordPress website, click on “Pages” then “Add New Page”. You will get the page editor interface. You will have to provide the page title and then add content to the editor found below the title bar.
You can add text, links, images or other media with what is known as content blocks. With your added, click publish to go live. The same process can be repeated to add more pages. If you are not ready for your content to go live just yet you can save the page as a draft instead and come back to it later. Don’t forget to spell check your WordPress posts or pages before making them public!
In most cases, you will want your pages to appear in the menu bar. Click on “Appearance” then “Menu” all found under the sidebar dashboard. Look for the page created earlier, tick the checkbox and then finalise by clicking on “Add to Menu”. Once added to the menu you will need to click the save button. Take a look at the front end of your site and you should now see your menu. (you may need to refresh the page).
The next phase is about adding posts to your WordPress website. Under the WordPress Admin dashboard, click on “Posts”, then “Add new”. A screen similar to the one used for adding pages pops up. We have the title section, post formats, category, and tags section.
You also have the save button and publish button that makes the content go live.
Additional WordPress Website Tweaking
At this point, your website has some content and it is time to tweak it a little bit.
Setting up a Static Front Page. Visit the “Settings” link in the admin menu and then “reading” page. Under the “Front page displays” option select
Changing Site Title and Tagline

After creating a website with WordPress, you might want to change the title and tag line. Visit the settings section and click on the “General” link. Your site title will be the name of your website while the tag line describes your website. The tag line section can be empty. Remember to save all changes.
Comment settings
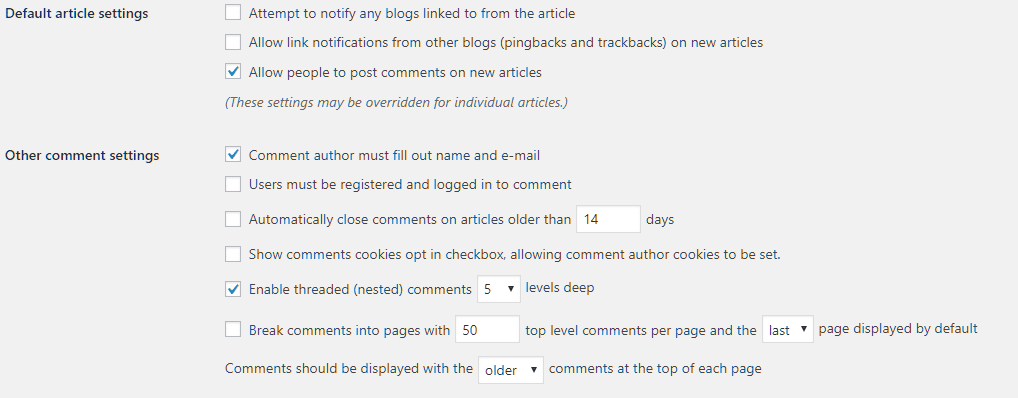
WordPress has a built-in comment system for all posts. However, this system is usually targetted by spammers. Therefore, you need to enable moderation of comments. Visit Settings and then “Discussions” page then click on “Before a comment appears” section. Tick the box next to “Comment must be manually approved” section.
Creating Navigation Menu
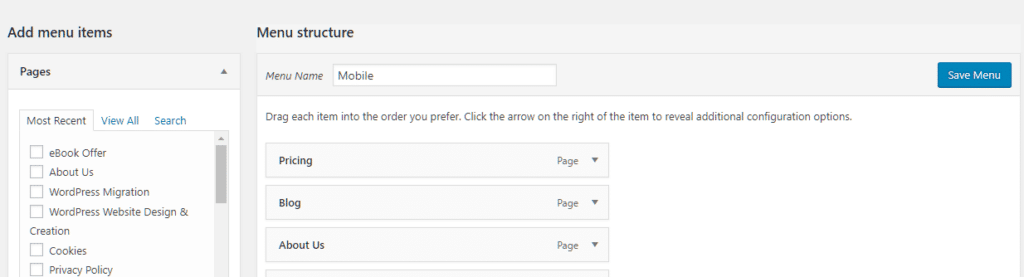
A navigation menu is important for users because they are able to tell the difference between pages. To change the default navigation menu, click on “Appearance”, then “Menus Page”. At this point enter the navigation menu name and then click on “Create a menu button”. The navigation menu is now created but it will remain empty.
In the next phase, select the page you want to be part of the menu and click “Add to Menu”. Once you have added all the pages you want to your menu click save and your menu should be live on your website.
Plugin Installation
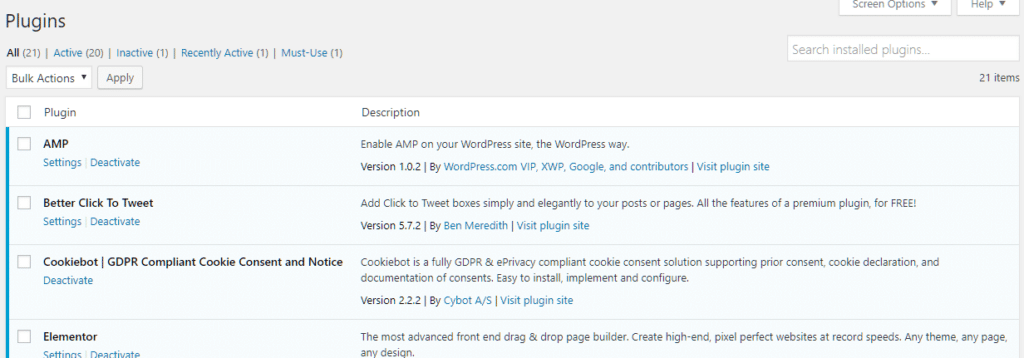
The last phase of creating a website with WordPress is the installation of plugins. Basically, a plugin is an extension that is built to expand WordPress capabilities. WordPress has thousands of plugins at your disposal. Based on your website needs, you can scroll through the ones that suit you.
Before you go adding every funky plugin you can find please keep in mind that with every plugin you add you also add another potential door for hacking. Using lots of plugins also slows your site down a lot so pick them wisely and only install them if you really need the functionality otherwise you will be sat asking your self why is WordPress so slow.
To start installing plugins, go to “Plugins” then click on “Add New” and search from the directory. Once you find your plugin, click on install and wait for a few seconds. You will then be required to activate the plugin. Some of the popular plugins for many WordPress websites are Yoast SEO for WordPress, WPForms, Monster Insights, and Facebook comments plugin.
Ready to Launch Your WordPress Website!
If you have followed the steps above, then congratulations! It’s likely your website is pretty much ready for launch! As you can tell, creating a website with WordPress is very easy. At this point, your website is ready and fully functional. Now you can post more content and interact with your readers.
Still finding this confusing? Have a look at our WordPress Care Plans, we can create, host and manage your site for you.