No one likes to be pigeonholed, but the content on your WordPress site needs to be. Categories are one of the ways WordPress does that, so what are WordPress categories, and how do you get the best out of them?
WordPress categories are a way for you to structure the content on your website. It files your posts into topic groups that help your website visitors better navigate your content, and it allows the search engines to more accurately serve results to their users.
Using categories correctly is an important feature of a successful website that you shouldn’t ignore.
Using WordPress Categories
When you are choosing the category meta on your website, you should stick to a relatively small number. Limit yourself to only 10 or fewer categories that define fairly broad topics that your content will fit into.
Planning out the content and direction of your website before you begin will help you better focus your site. Write down the topics you want to cover so that you can plan the structure of the website. This should make your site more logical and easier for your visitors to navigate, helping them find what they are looking for without them getting lost or annoyed at the structure.
When you publish your posts, you can choose which category best fits the topic you have written about. If the subject matter of your post fits into a couple of categories, that’s fine, but you shouldn’t really go above 2 categories for any post.
Categories within WordPress are hierarchical, meaning that you can have sub or child categories to filter your content better. They are referred to as child categories because these subcategories have what is considered a parent, which is the larger, much broader section of the website.
For example, if you had a website about cars, you might have a category called “Prestige”. Then underneath that, you might have child subcategories of “Jaguar”, “BMW”, and “Mercedes”. If necessary, you can also have grandchild categories. Under the “BMW” child category, for example, you could have “3 Series”, “5 Series”, “7 Series”, and “Z4”, etc.
It is best to decide on your main WordPress categories reasonably early on in creating your website. These categories will be very broad umbrella topics covering the main subjects you expect to discuss on the site. Decide on less than 10 of these categories that will break up your main subject topic. You can always add a few later if you realise you’ve missed something or a new topic becomes popular in your niche.
Looking for a complete WordPress Maintenance Plan?
With all ThriveWP care plans, we include free migration, malware removal, daily/hourly backups, plugin theme and core updates, ongoing support and 24/7 security monitoring and firewall.
To make navigating your blog a lot easier for your visitors, you can list your categories in the sidebar. To do this, you will need to use a widget. Click on “Appearance” in the menu and then go to “Widgets”. You should be then able to drag the categories widget into the sidebar section and drop it. This should then display in the sidebar all of your categories that have posts in them.
The options in the widget will allow you to have your categories displayed as a drop-down menu instead of a list if you want. You can also choose to show the number of posts within that category and show the parent and child categories by ticking the “Show Hierarchy” box.
Not choosing the “Show Hierarchy” option will lead to both parent and child categories being given the same prominence in the list. Depending on your website subject and the WordPress theme you are using, this may or may not be what you are looking for.
Selecting “Show Hierarchy” will instead display the child categories differently to the parents. How this is handled will depend on the theme you are using, however. The subcategories could be indented compared to the main topics, or a different font style might be used to differentiate.
Instead of the sidebar, you might want to add your categories to the main navigation menu. To do this, you will go to “Appearance” then “Menus” and click on “Categories”. Select the categories that you want in the navigation menu and hit the “Add to Menu” button.
How to Add WordPress Categories
In WordPress, the default category is “Uncategorised”. So when you initially write and publish your posts, they will often fall into this default category, often without you realising. To change this, you need to select the correct category when creating or editing your blog post, though you won’t have any other options than “Uncategorised” in the beginning.
If you don’t like “Uncategorised” as the default, it can be changed. As long as you are the administrator, you can go into “Settings” and then “Writing” and change the “Default Post Category” using the drop-down menu. Though before you do that, you’ll want to add some new categories.
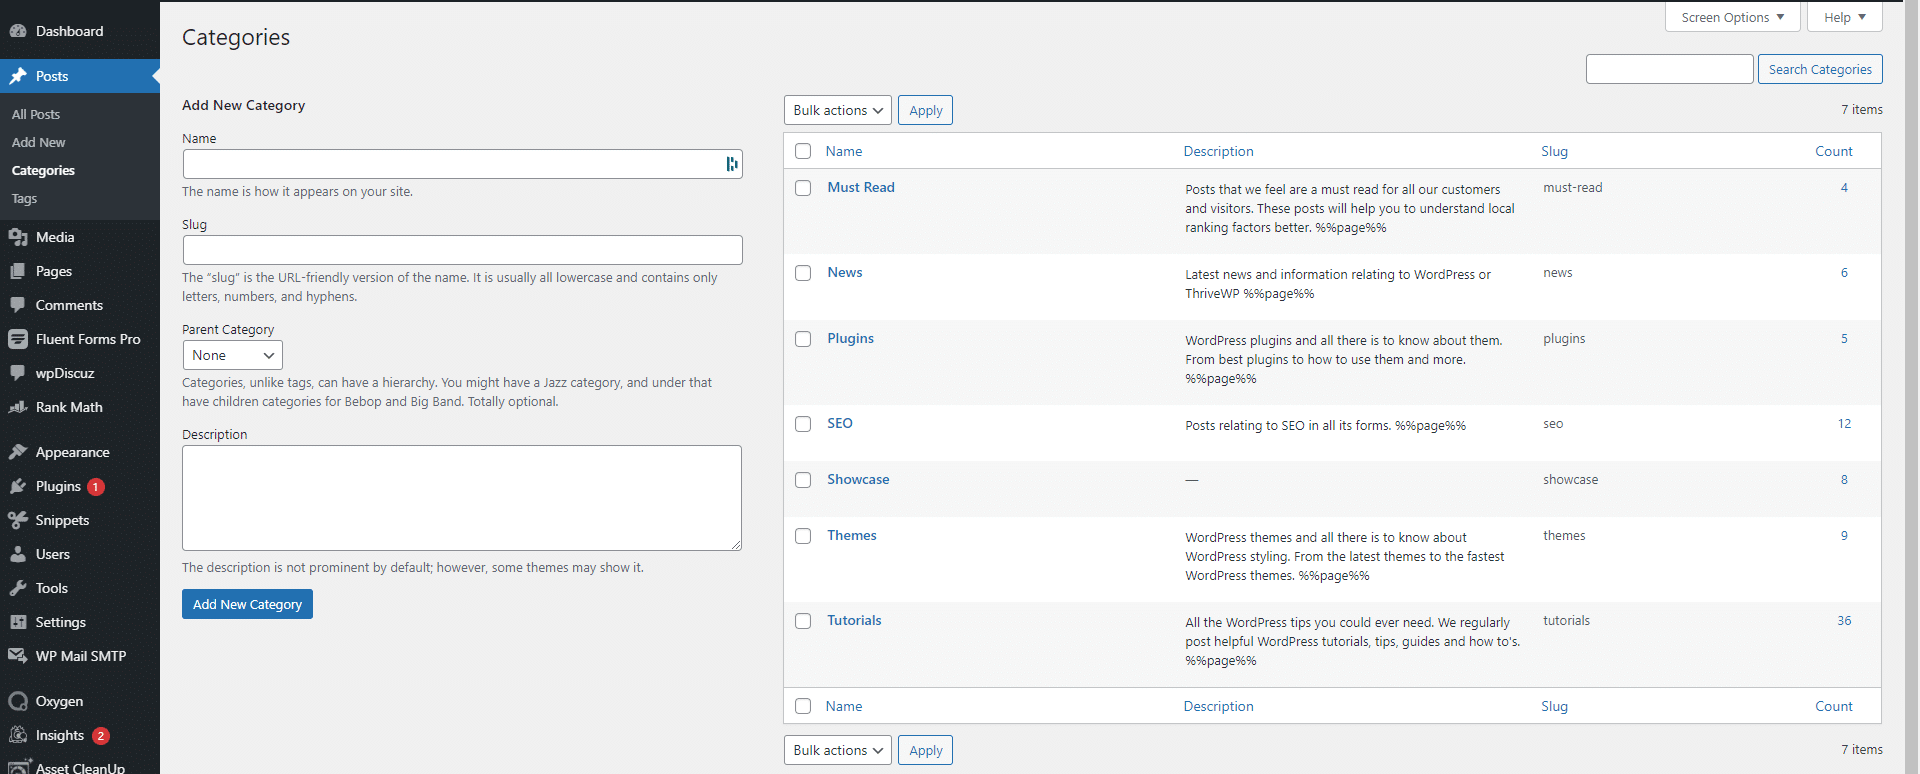
New categories can be created by going to “Posts” and then “Categories”, though you can also click on the “Add New Category” link when editing a post. Fill in the name of your category, and slug name for that category. The slug should only contain lowercase letters or numbers, as well as hyphens since this will make up part of the URL.
WordPress will automatically create a slug name for you if you don’t add your own. The slug will link to the category page that will list all of the posts in that category.
You can leave the drop-down menu for “Parent Category” as “None” if this is one of your main categories. There is also the option to write a description of your category, though don’t worry if you don’t want to do this or any other section now, as you can come back and edit them later. This description will be displayed on the categories page in some themes, so it could be an important box to fill in.
Creating a Child Category
Creating a child category is very similar to creating a normal category. Just go to “Posts” then “Categories” as before, fill in the name and slug, and choose the correct parent category from the drop-down menu. Once you click on the “Add New Category” button, this child category will be created below its parent.
Editing Categories
Changing or completely removing your categories is a quick process. Go to “Posts” and then “Categories” in the menu, and you should see a list of the categories you have created. Below the names, there should be options for “Edit”, “Quick Edit”, and “Delete”.
Clicking on “Edit” will allow you to change parent and child categories, alter the name and the slug, as well as the description.
While the “Delete” option is fairly self-explanatory, you don’t have to worry about any posts in that category being deleted as well. Any posts in that category will be moved to the default if they aren’t already in any other categories. The default will be “Uncategorised” unless you’ve changed it previously.
If you need to change a few of your categories at once, you can choose “Bulk Actions” and then select what you need to do in the drop-down menu. This will allow you to select multiple categories to delete in one go.
What are Taxonomies?
Within WordPress, a category is one of the standard taxonomies, but what is a taxonomy?
The word taxonomy comes from biology and is a way of classifying and organising living things. In WordPress, taxonomies are the method of grouping similar posts together. Popular taxonomies within WordPress are categories and tags.
What is the Difference Between Categories and Tags?
Categories and tags are used to link together topics and keywords within your content, making navigation easier. Categories are more structural, while tags offer a descriptive element. Tags are generally linked to keywords, with WordPress categories being much broader.
You need to be more careful with your use of categories than you do with tags. Visitors to your site might use tags to give them more context, offering them a shortcut to understanding and finding the information they want. You can create many tags to suit the subjects you talk about, but you need to be more careful with categories.
How to Change Tags to Categories
If you find that you are using a tag on a lot of your posts, it might be better as a category. Perhaps you want to do the opposite and turn a category into a tag, but whatever the case, the method is the same.
Click on “Tools” in the sidebar menu and then “Import”. You should then see the “Categories and Tags Converter” option, click it. After that, you need to click the “Run Importer” button to begin the process. This will ask you to confirm your choice to install the importer.
After this importer plugin has installed, you need to activate it and then run the importer. Once you have clicked “Run Importer”, it will give you the option of changing tags to categories or vice versa. Select the ones you want to change and click the “Convert” button.
Final Thoughts
Using categories is important for your WordPress site. It not only helps your visitors but should benefit your search engine presence too.
While you can edit and delete your categories very easily, doing some planning before you begin will help you avoid the need to make a large change like this. Once you have your categories, make them easy to use by putting them in a menu where your visitors can see them, making navigating your content a pleasure.